This chapter introduces the use of graphic images in web pages and explains how images can enhance both the visual appeal and effectiveness of a website. You will learn how to add images to HTML documents, control their size and placement, and use image-related attributes and styling techniques to create professional page layouts. The chapter also examines common image formats and discusses best practices for selecting and optimizing graphics for the web. In addition, this chapter explores how images can be integrated with hyperlinks, backgrounds, and page design elements to improve navigation and user experience. By the end of the chapter, you will understand how to incorporate and manage graphics effectively, creating web pages that are both visually attractive and efficient to load and display.
5.1 - Graphic Formats
Graphic Formats
Graphic images can be used to enhance the look of Web pages as well as to provide content that supports the textual information on a page. When used judiciously, images can be attractive and informative; when used to excess, they can be distractive and bothersome. When choosing images to place on a page you need to make sure that they support the purposes of the page and that they do not detract from them. Plus, you need to make sure that the file sizes of images, many of which can become quite large, do not cause unnecessarily long download times.
GIF (Graphics Interchange Format) is the most widely supported graphics format. Pictures saved in this format have the .gif file extension. GIF format can display images in black and white, grayscale, or color. When used for color pictures the GIF format is limited to displaying up to 256 colors. Normally when a graphics program saves an image in GIF format the software uses (up to) 256 colors that best represent the colors in the picture. Because of the compression technique used for GIF images, this format is best for pictures with spot colors rather than continuous colors. In other words, this is a good format for line drawings, logos, icons, text, and other images with discontinuous colors; however, it is not the best format for photographic images.
One of the concerns about using graphics on a Web page are the file sizes produced by the format. Larger file sizes mean longer download times that cause visitors to wait longer than necessary before being able to view the page. In general, it is not the size of the GIF image that affects the size of the file, it is the number of different colors in the image. Therefore, the most effective way of reducing file sizes and reducing download times is to reduce the number of colors in the image.
Most graphic programs permit choices of the number of colors saved with an image. In Figure 5-1 are shown two save options for GIF files permitted by Adobe PhotoShop. The default option on the left uses the full complement of 256 colors. The color pallet for the image is shown in the bottom-right of the picture. It produces a file size of approximately 10.9 KB. On the right is the same image formatted with 16 colors. There are no noticeable differences between the two pictures. The one on the right, however, produces a file size of only 3.5 KB. If you are creating your own images, you should explore techniques that make your file sizes as small as possible without distorting the image or misrepresenting its colors.
Figure 5-1. Options for saving GIF images with varying color palettes.
One version of the GIF format -- GIF89a -- has the capability of producing transparent images. You can specify one particular color in the image which is then rendered transparent when the image is displayed on the page. Most often this is the single background color in the picture. When set to transparent, the background disappears, and leaves only the foreground image displayed against the page background. The following figure shows the transparent effect.
Figure 5-2. Standard and transparent images against a patterned background.
Both the standard and transparent images are created on a white background and are saved as GIF89a files. The "Transparent" image, however, has the color white selected as the transparent color. When the images are displayed on a textured background, the white background of the transparent image is rendered transparent to permit the page background to show through. Of course, if the background color of the page is the same as the background color of the image, then there is no need to make the picture background transparent.
Another feature of GIF89a format is its ability to produce interlaced images. Normally, when an image is loaded into the browser it is revealed a few lines at a time beginning at the top of the picture. If the file size is large and the connection speed is slow you see the picture revealed a little at a time until the complete picture is downloaded.
If you choose to save your images as interlaced then the entire picture is revealed at increasingly higher resolutions. That is, it is first revealed as a low-resolution version of the entire picture. As more of the picture is downloaded it becomes sharper and sharper as more details are added. Although the time taken to download an interlaced image is the same as for a regular image, it often appears to download faster since the complete, although not final, image is viewable much quicker. Whether you use standard or interlaced images is more a personal preference than technical need.
Figure 5-3. Interlaced image revealed at increasingly higher resolutions.
Multiple single images can be packaged together to produce animated GIF images. These are image files containing two or more images that are revealed in a timed sequence.
Figure 5-4. An animated GIF Image.
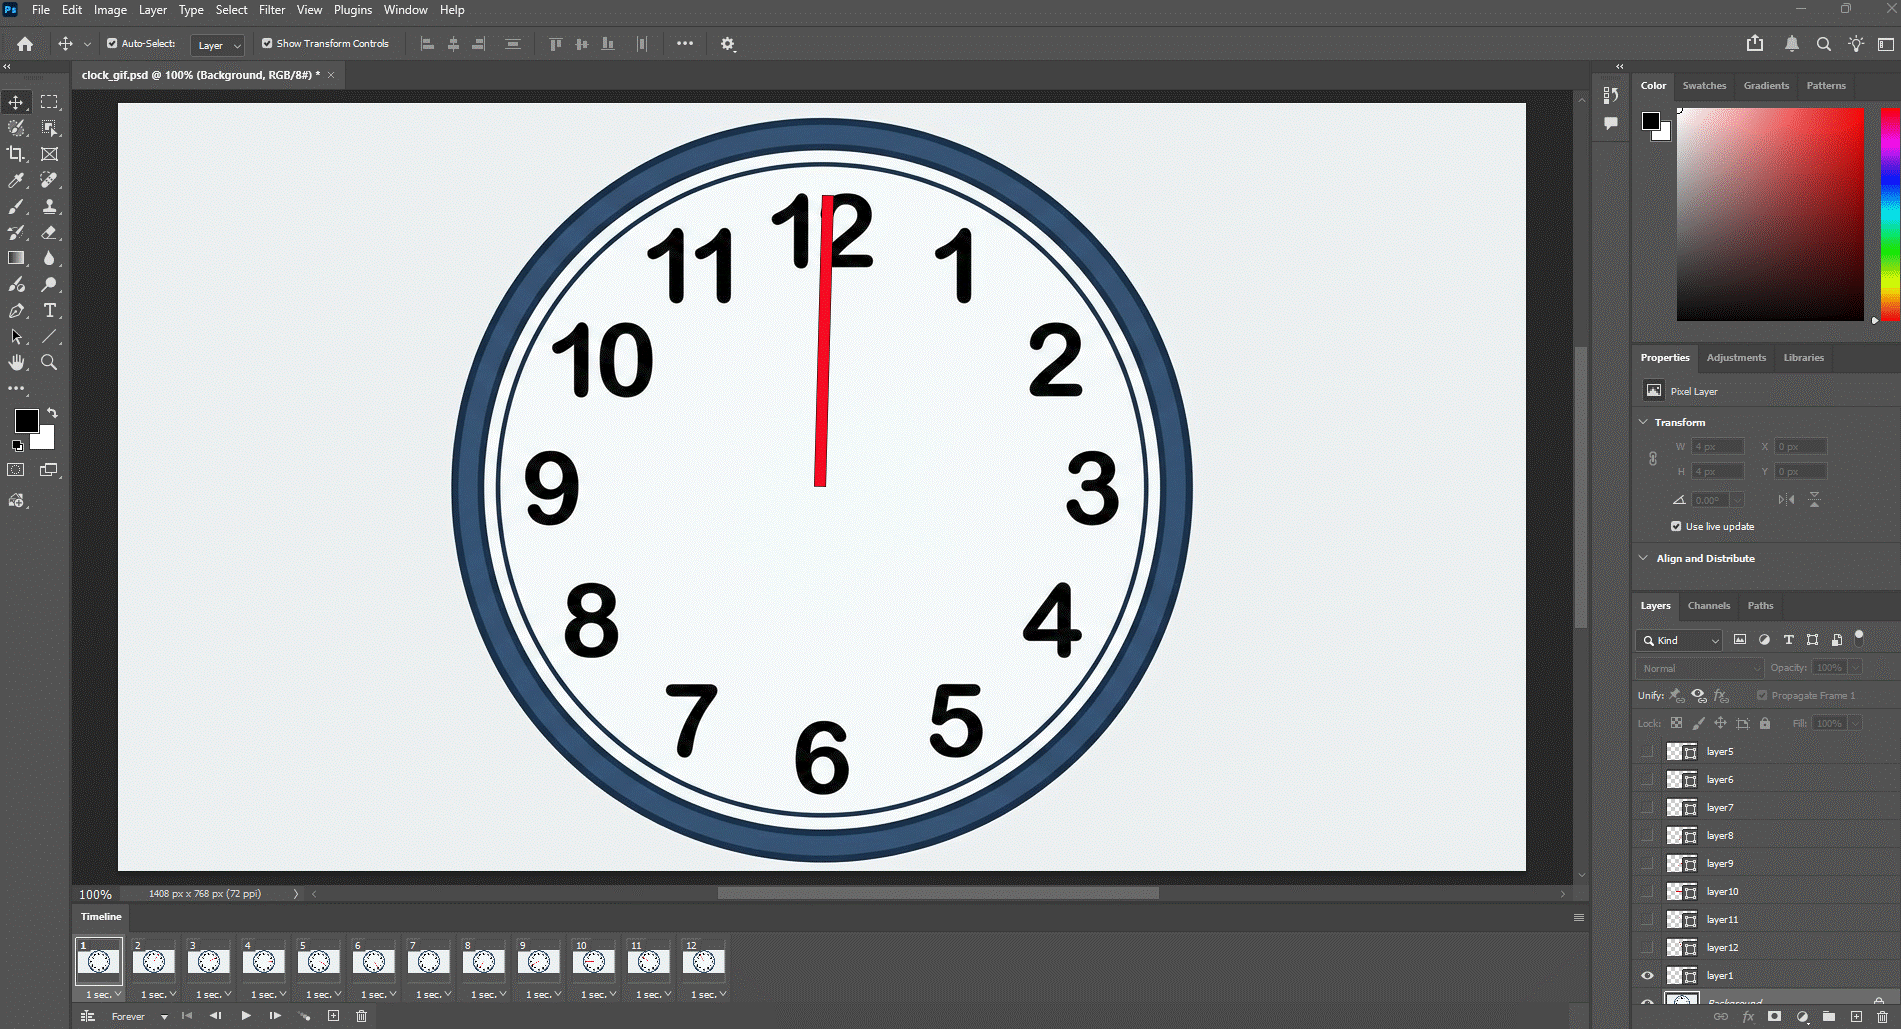
The following Adobe Photoshop screen shows the creation of multiple images used to produce the above clock, whose second hand iterates through an abbreviated 60 seconds. Each hand position is created as a different layer of the image. The software converts the layers to animation frames, or cells that are revealed in sequence when saved as a GIF file.
Figure 5-5. Adobe Photoshop screen showing animation cells created from individual layers of a clock image.
A slightly different animation technique is used in other animation programs. Some GIF animators require the creation of separately saved GIF images. Each image represents a different frame of the animation. These individual GIF files are imported into the software and are converted into sequenced cells of the animation.
An animated GIF file is retrieved by the browser just like any other GIF file. When displayed in the browser, the file produces the animation. Of course, if you are not particularly skilled in working with graphics or you do not have the patience to put together the series of pictures to be animated, you can probably find animated GIF images on the Web that suit your needs.
When images are saved, they are compressed to help reduce redundancy of the image data so that the image can be stored or transmitted in an efficient form. Image compression may be lossless or lossy. With lossless compression nothing in the original image is lost. When viewed in the browser, the image will contain the same number of pixels as the original image. Lossless compression is used when the GIF is saved. In contrast, lossy compression means that some of the pixels in the original image are lost or removed. When viewed in the browser the image will be similar, but not exactly the same as the original image.
A newer format that is increasing in popularity is PNG (Portable Network Graphic) format, pronounced "ping." This format is used for the same purposes as GIF; however, it produces smaller file sizes and faster loading times without loss of resolution quality. It can reveal interlaced images and produce them faster than GIF format.
The most noticeable difference between PNG and GIF formats occurs with transparent images. PNG format permits up to 254 levels of transparency, and allows images to better blend with the background color or pattern of a page. Figure 5-6 shows the blending differences between PNG and GIF images.
Figure 5-6. Comparison of PNG and GIF formats agains a page background color.
In the GIF image on the right, transparency of pixels is either "on" or "off," and produces hard edges surrounding what would otherwise be a smooth transition between the drop shadow and full transparency of the image's background. A white "halo" surrounds the drop shadow at its boundary with full transparency. In contrast, the PNG image on the left blends smoothly with the background color. This results from its multiple levels of pixel transparency whereby pixels surrounding the drop shadow take on increasing levels of transparency the further removed they are from the image.
The JPEG (Joint Photographic Experts Group) format is designed for storing photographic images with millions of colors at different compression rates. During compression, graphics programs use special algorithms to sample and render colors close to those in the original picture but without retaining full color information in order to minimize file sizes.
You normally have a choice of compression settings when saving pictures in JPEG format. Smaller file sizes normally mean greater loss of picture details. Still, with moderate compression you can display an image on screen that appears very similar in quality to the original picture. The four pictures below show the original image and three compressions along with resulting file sizes.You can notice a loss of sharpness in those images with higher compressions and smaller file sizes.
Low (4KB)
Medium (6KB)
High (11KB)
Maximum (47KB)
Figure 5-7 JPEG images at various compressions.
For Web images that are displayed at normal 72 pixels per inch, compression percentages that reduce file sizes to as small as 1/8 to 1/4 of original file sizes still retain satisfactory visual precision.
JPEG images are saved as files with the .jpg extension. JPEG format does not support interlacing or transparency; plus, it is not a good format for text or line drawings since the precision needed to produce straight lines or hard edges is not as accurate with compression.
The following table provides a summary of the image file types.
How do you obtain graphics for your pages? There are many sources for obtaining graphics: create graphics using a graphics application such as Adobe Photoshop, Adobe Illustrator, and Jasc Paint Shop Pro; download graphics from a graphics web site; purchase a graphics collection online; take digital photographs; or scan existing photographs. The following are a few sites that may be helpful when looking for graphics:
Microsoft Clip Art
Free Stock Photo Search Engine
SuperStock
Free Images
FreeFoto
OpenPhoto
Stock Photography
Search Engine for Stock Photos
Always use caution when downloading graphics from the Web. Materials on a Web site are copyrighted and are not free to use unless the owner of the site permits it.
A graphic image is placed on a Web page by making reference to the location of a GIF, PNG, or JPEG file. The image file is then downloaded from the Web server along with the page. As the browser displays the page, this reference is used to retrieve the image and place it on the page.
Graphic images are placed on Web pages by using the <img> tag. The general format for this tag is shown in Figure 5-8. Note that the <img> tag is not a container tag and does not require a separate closing tag.
<img src="url" alt="text">
Listing 5-1. General format for <img> tag.
An <img> tag appears on the Web page at the location at which the image is to be displayed. The src (source) attribute gives the location of the image file. This can be a local or remote URL. The alt (alternate text) attribute is required under HTML5 standards. It provides a text description of the picture which appears instead of the image if the image cannot be loaded or displayed.
Not only is it a requirement, including the alt attribute provides accommodation for users with visual impairment. Special browser software can verbalize the text string when the picture itself cannot be viewed in detail. Therefore, you should take care to provide alt text that gives an accurate and useful description of the picture. Also, browsers can display the text while waiting for the image to download, thereby giving visitors a text preview of the visual contents of the page. Finally, some people prefer to turn off display of graphic images altogether to speed up page downloads or when printing the page. These pop-up boxes help to identify images that are not otherwise displayed.
Displaying Local Images
An image file can be located in the same directory as the Web page which displays it; or you can create a separate folder for storing images, usually subordinate to the Web page directory. If the file is in the same directory as the Web page, only the file name is needed as the src URL, as shown in the following listing.
<p><img src="yoda.jpg" alt="Picture of Yoda"/></p>
Listing 5-2. Displaying an image located in the same directory as the Web page.
Figure 5-8 show the display of this image file.
Figure 5-8. Display of image file.
If the image file is in a different directory from the Web page that displays the picture, then the path to that folder needs to be coded as part of the src URL. In the following example, an image file is located in the Media folder, a subdirectory of the directory containing the Web page that displays the image.
<p><img src="Media/yoda.jpg" alt="Picture of Yoda"/></p>
Listing 5-3. Displaying an image located in the Media subdirectory of the current page directory.
Displaying Remote Images
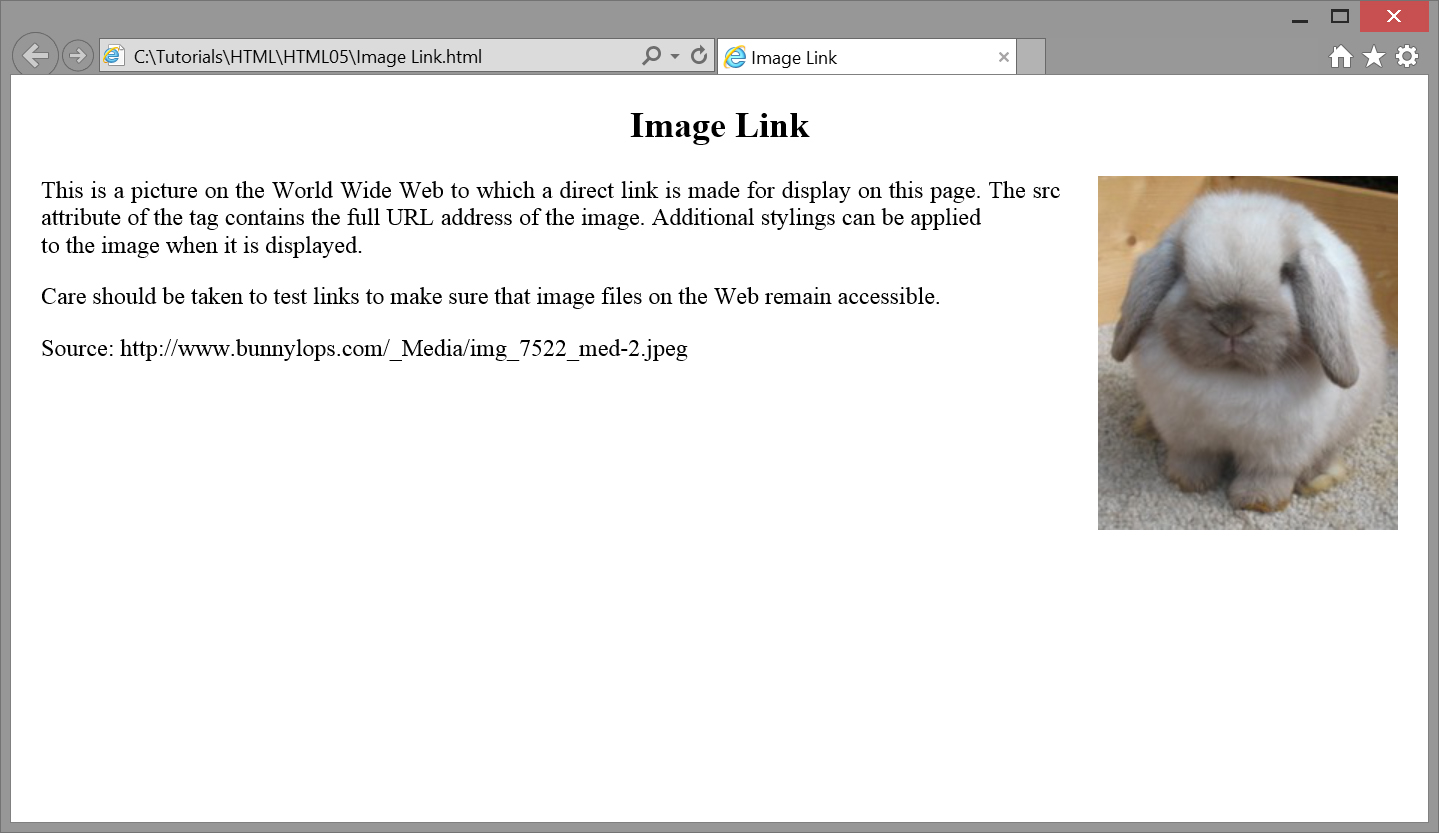
You can connect to and display images that are located anywhere on the World Wide Web without having to download the image for display from a local directory. In this case, a full URL address to the image, beginning with "http://", is required in the src attribute. Figure 5-10 shows a Web page with a link to a remote image file. Note that coding of the <img> tag includes reference to the site and to the directory path of the image.
<img src="http: //www.exoticfelineimages.org/20050805/images/2005-08-05%2012.03.03.jpg" alt="Picture of an adorable bunny"/>
Figure 5-9. Remote Image linked to and displayed on Web page.
When linking to remote pictures you should give reference credit. It may be necessary, as well, to get approval from site owners to link to their resources. Since you are relying on others sites to remain accessible, you need to continually check the link to make sure the image is still available.
Unless you specify otherwise, an image is displayed at its original width and height. By coding the width and/or height style, you can resize the image for display. If you intend to resize the image proportionately, you need only to code either a width or height dimension. The browser determines the appropriate size for the other dimension to maintain proper scale. However, you can purposely distort an image by coding disproportionate width and height sizes.
The following image is displayed in two sizes -- its original size and at 1/2 its original size. Only the width is changed to permit the browser to set the picture height to maintain proportionality.
<img src="SlowLorisFull.jpg" alt="Picture Of a slow loris"/><img src="SlowLoris.jpg" style="width: 60px" alt="Picture of a slow loris"/>
Figure 5-10. Images displayed at full size and at 1/2 size.
When resizing an image, it is best not to attempt to enlarge the picture beyond its original size. Its original size is its best and sharpest resolution. By enlarging the image, "pixelization" may occur which produces loss of sharpness. Most computer monitors display images at 72 dpi (dots per inch). It is usually satisfactory to save and display images at this resolution. Saving images at higher resolutions does not produce noticeable display improvement, and it results in larger file sizes that increase download times.
As with other page elements, alignment styles can be applied to position a picture on the page. The usual choice is whether to display the picture in-line with surrounding text, on a line by itself, or to float the picture so that accompanying text wraps around it.
Stand-alone Images
If an image appears on a line by itself, then it can be positioned horizontally to the left, to the right, or centered. This positioning occurs by coding the text-align style, not for the image itself, but for a container encompassing the picture, usually a <p> or <div> tag that separates its content from surrounding text with a blank line or line break.
<p style="text-align:center"><img src="Earth.gif" alt="Picture of Earth"/></p>
Figure 5-11. Horizontal alignment of an image using a <p> tag.
In the above example, the <img/> tag is included inside a paragraph to offset it from surrounding text by blank lines. Paragraph content is centered thereby centering the image contained in the paragraph.
Figure 5-12. A floated image.
Floated Images
Images can be floated to the left or right of the page -- with word wrap around the picture -- by coding the float:left or float:right style inside the <img/> tag. Extra white space can be included around the picture to separate it from surrounding text by increasing its margin settings. The accompanying image is floated to the right and has a left margin setting of 25 pixels to leave space between the image and this paragraph.
<p><img src="Earth.gif" alt="Picture of Earth"style="float Right(); margin-left:25px"/>
... wrapped text ...
</p>
Listing 5-4. Code to float an image to the right of the page.
Remember, when images or other page elements are floated to the left or right of the page with word wrap around them, the <img/> tag is coded first followed by the wrap-around text.
In-line Images
An image can appear "in-line," that is, on the same line as its accompanying text. In this case, it needs to be determined how the text is to be aligned with the image. By default, text surrounding an in-line image is aligned with the bottom of the picture. You can, however, apply the vertical-align style property to the <img/> tag to reposition surrounding text. Values for the vertical-align property are shown in Figure 5-13.
Property:
Value
vertical-align
text-top middle text-bottom (default)
Figure 5-13. Vertical-align style property.
Application of the vertical-align style to in-line <img/> tags is illustrated in Figure 5-14. Accompanying text is align with the top, middle, and bottom of the pictures.
<p>A picture <img src="Stonehenge.jpg"style="vertical-align: Text-top"/>
with text vertically aligned text-top.</p><
A picture <img src="Stonehenge.jpg"style="vertical-align:middle"/> with text vertically aligned middle.</p><p>A picture <img src="Stonehenge.jpg"style="vertical-align:text-bottom"/> with text vertically aligned text-bottom.</p>
A picture with text vertically aligned text-top.
A picture with text vertically aligned middle.
A picture with text vertically aligned text-bottom.
Figure 5-14. In-line images aligned with accompanying text.
Recall from an earlier discussion that you are limited to using font faces that are installed on the user's computer system. Irrespective of the fonts you have available to design your pages, they will not display properly unless they are also available to your visitor. Although if you insist on using a particularly font, then you can convert text to a graphic image and place it on the page.
ormally you will create a single letter or word for display in stylish characters. The example letter at the beginning of this paragraph is from the Adobe Rosewood font collection. Most users probably do not have this font installed on their systems. However, it is visible in the browser because it has been converted into a graphic image and placed on the page with an <img/> tag that floats to the left of this paragraph.
Figure 5-15. Example of a heading image.
The same technique can be used to create headings. Use your favorite graphics program to style the text and save it as an image, then place it on the page with an <img/> tag. Be careful about using too many fancy styles. They can be distractive.
You can use shortcut icons to display your logo or some other small graphic on the Internet Explorer favorite's menu or Firefox bookmark's menu, and address bar. They have no special Web server requirements and are a great way to add brand recognition to your Web site.
A shortcut icon must be square in size, and at least 16 x 16 pixels. Consider creating both a 16 x 16-pixel icon as well as a 32 x 32-pixel icon (and larger, bandwidth permitting). This course of action might be necessary because on high-DPI displays, Internet Explorer may stretch the icon to fit the available space.
The following are popular programs and tools for creating shortcut icons:
After creating the icon, you must associate it with your Web page. This is done by adding a line of XHTML code to the page's head element. The line of code includes a <link> tag that specifies the location and name of the icon file. You can include this <link> tag on a per-page basis. First, save the icon with a file name other than favicon.ico, and then add the following code to the head element of your page.
There are a number of deprecated <img/> tag attributes that are being replaced by style settings. You are likely to encounter these attributes on older Web pages, but you are encouraged not to use them on your pages.
border="n"
A solid black border is drawn around the image with the border attribute. The size of the border is given in n pixels.
align="top|middle|bottom" align="left|right"
One version of the align attribute controls the placement of text surrounding the image. When using align="top", align="middle", or align="bottom", the image appears in-line -- on the same line as surrounding text -- and accompanying text is aligned with the top, middle, or bottom of the picture. These three alignments attributes are identical in effect to the vertical-align style properties text-top, middle, and text-bottom. If alignment is not specified in the <img/> tag, the image appears in-line with surrounding text aligned with the bottom edge of the picture.
A second variation of the align attribute controls word-wrap around the image. When align="left" or align="right" is coded, the image appears at the specified left or right margin of the page with accompanying text wrapped around it. The <img/> tag must appear immediately before the text that is wrapped around it. These alignments are identical in effect to the float:left and float:right style properties.
hspace="n" vspace="n"
You can insert space around an image by using either or both the hspace (horizontal spacing) or vspace (vertical spacing) attributes and specifying the number of pixels for each. The hspace attribute specifies the number of pixels of blank space to leave on the left and right sides of the image; the vspace attribute specifies the number of pixels to leave at the top and bottom of the image. Unlike using margin style settings, you cannot control spacing on individual sides of the image.
height="n" width="n"
Image sizes are controlled by height and width attributes. These work identically to their style property counterparts, using pixel measurements to set image sizes.
Any HTML container, from the <body> tag down through the <span> tag, can use graphic images as backgrounds behind their text content. Of course, you need to be judicious in selecting images that do not overpower or detract from the text communication intended by the page.
Most background images are textures rather than pictures. Pictures tend to be too "busy" and distract attention from the message. These textures are either standard GIF or JPEG images; plus, the images are usually not the full size of the container for which they provide the background. Textures are small, specially designed images that can be repeated across and down a page and fit together seamlessly to form a smooth backdrop.
The accompanying graphic is typical of an image used as a background for page elements. It displays a texture that fits together side by side when the image is repeated horizontally and vertically across and down the background area of the page element. Repeatable textures such as this are sometimes difficult to make, but there are plenty to choose from at most Web clip-art sites.
There are four style properties pertinent to displaying background images behind text containers. These styles, shown in Figure 5-17, select an image, repeat an image, position an image, and affix an image for text over-scrolling. Not all properties are required for all background images.
Property:
Value
background-attachment
Sets how a background image is attached to a document, whether or not the image scrolls with the text. fixed scroll
background-image
Sets the background image of page element specified as url(url) none
background-position
Sets the location of the top-left corner of the background image relative to the top-left corner of the container element, using a measurement, a percentage, or a keyword or pair of keywords. left top left% top% top|right|bottom|left|center top left|top center|top right center left|center center|center right bottom left|bottom center|bottom right
background-repeat
Sets whether background image repeats horizontally, vertically, in both directions, or not at all. repeat-x repeat-y repeat no-repeat
Figure 5-17. Background style properties.
A background image is specified with the background-image:url(url) property, where the location of the image file is given by its url address. If the image file is stored in the same location as the page, only the file name need be coded. If no other style settings are made pertaining to the background image, it is repeated horizontally and vertically, and across and down the container to fill the background with the image.
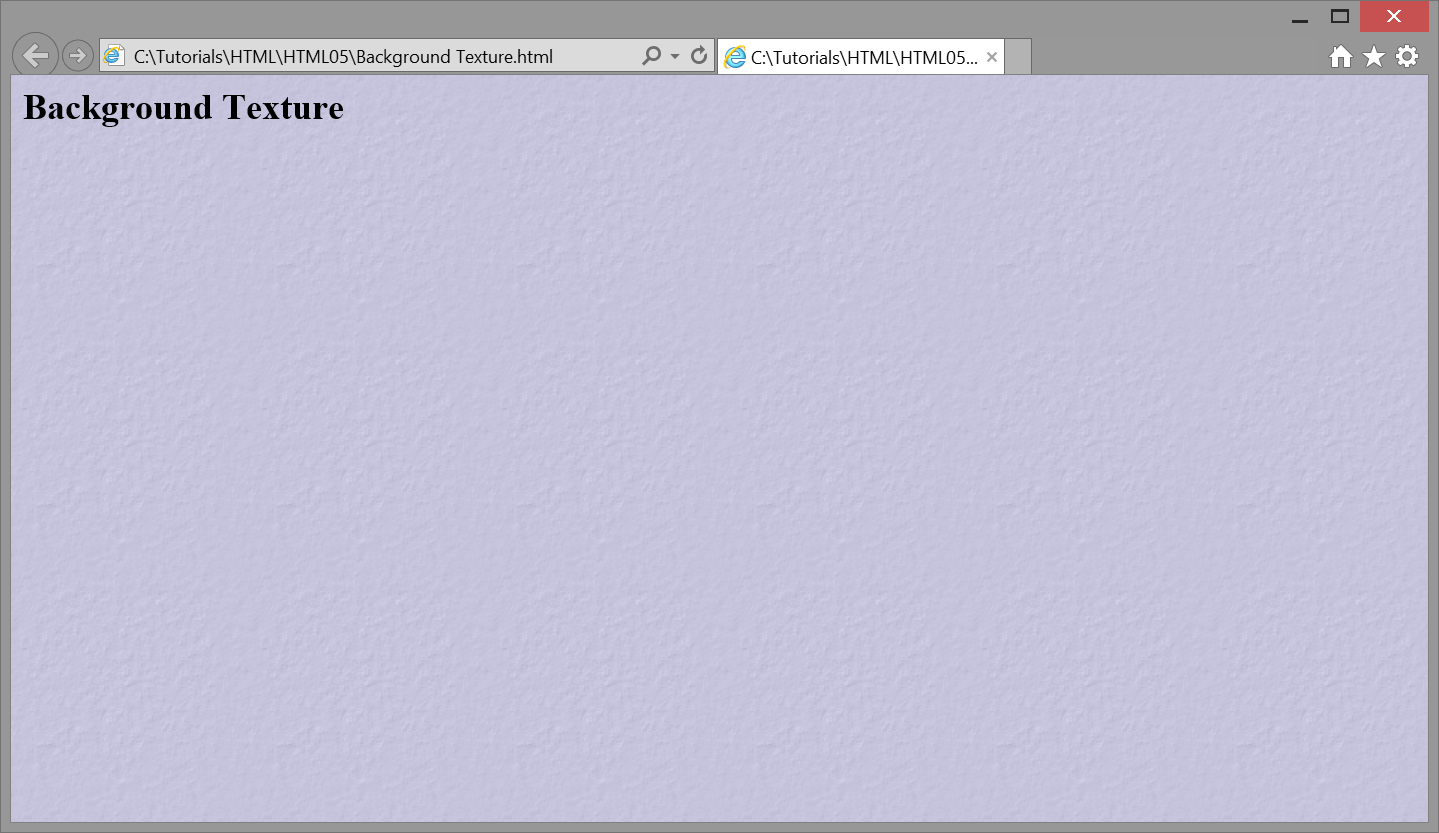
The page shown in Figure 5-21 uses the background-image property to fill the page horizontally and vertically with a texture. No other style properties are required.
    <style>
      body {background-image:url(Background.jpg)}
    </style>
Figure 5-18. Page with texture image used as background.
The Background.jpg image has an actual size of 144 x 144 pixels, or 2" square. With no additional style properties given, the image is automatically repeated across and down the page the fill to available space.
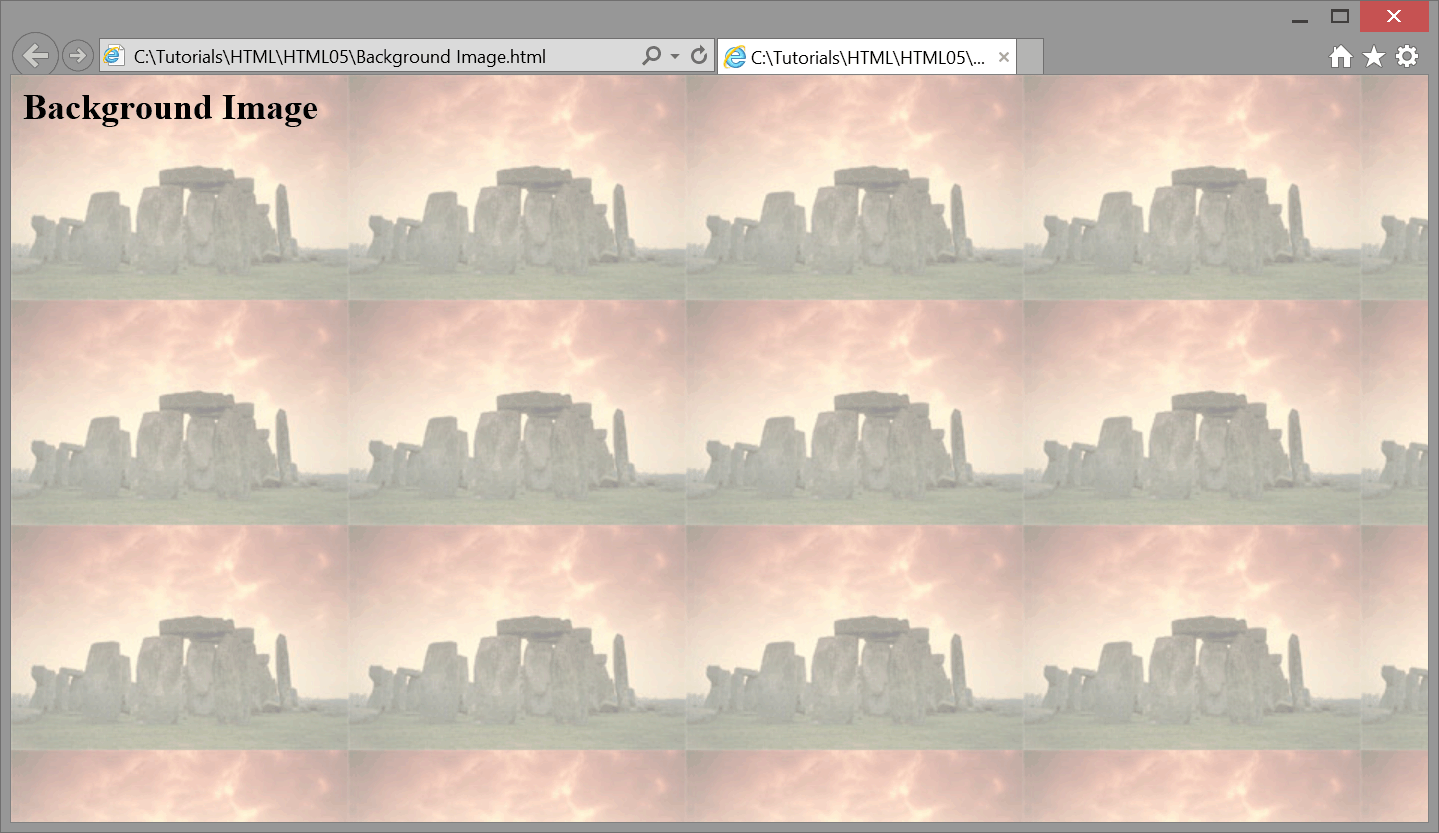
Of course, it is not necessary to use repeatable textures as background images. You can make use of any GIF or JPEG image. You need to be cautious when using regular images as backgrounds since they may have colors that are too intense and make the overlaying text difficult to read. If you have photo editing software available you can reduce the opacity, or transparency, of the image to temper its intensity for use as a "watermark" image. This is done for the image shown in Figure 5-19.
    <style>
      body {background-image:url(Stonehenge.jpg)}
    </style>
Heading
Figure 5-19. Page with repeated background image with reduced opacity.
As in the case of the previous background texture, the image repeats both horizontally and vertically to fill the page. This repeating pattern is more noticeable when using a regular graphic image.
You can cause one or more background image to appear by coding the background-repeat property. The value repeat-x repeats the image horizontally for as many times as needed to fill the container from left to right thereby producing a single row of images; repeat-y repeats the image vertically for as many times as needed to fill the container from top to bottom subsequrntly producing a single column of images; repeat repeats the image in both directions to completely fill the container (the default value); and no-repeat produces a single image in the top-left corner of the container.
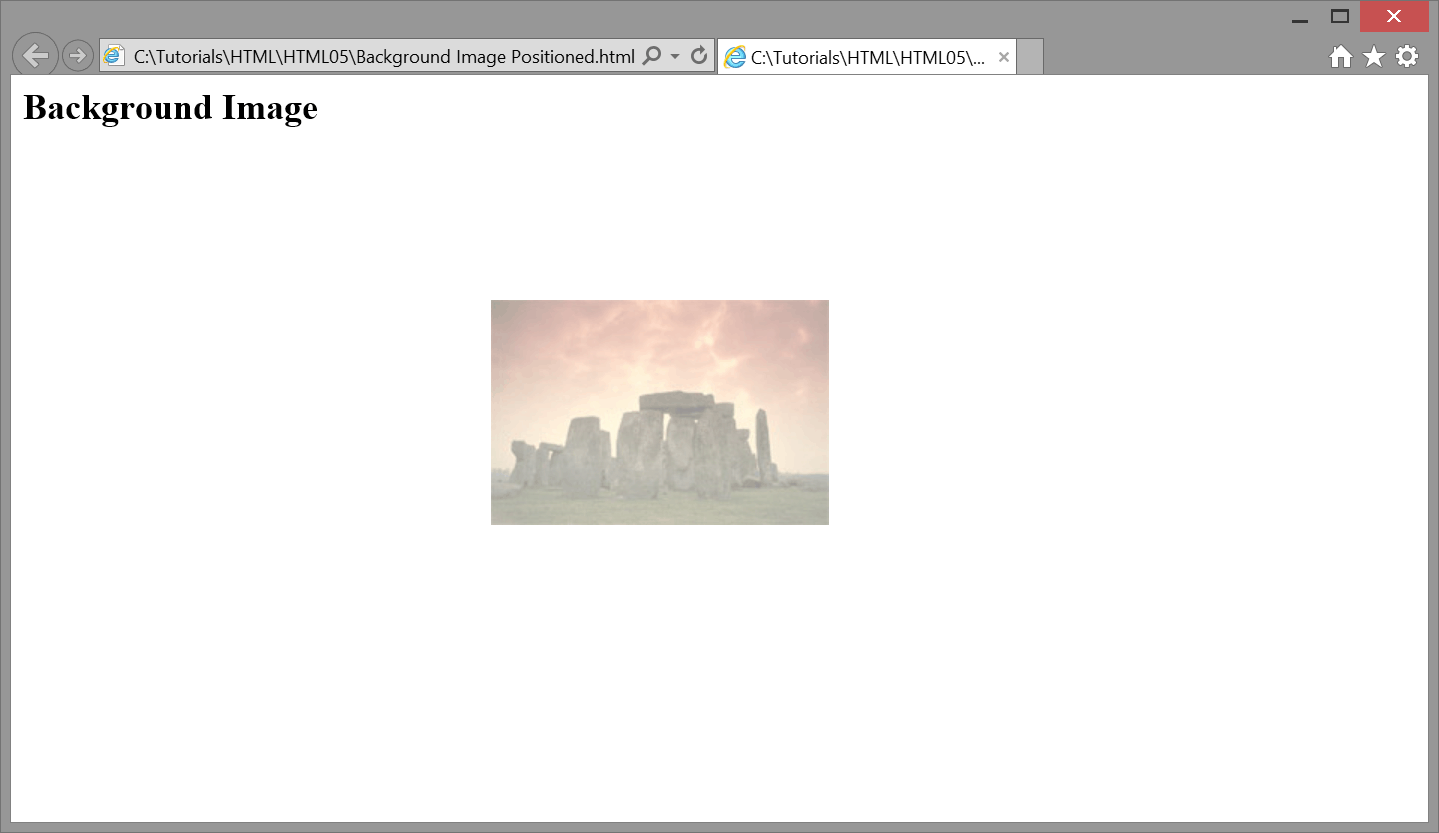
If an image is not repeated, you can indicate the location of the single image inside the container by coding the background-position property. The following code positions an image in the center of the page with background-position:320px 150px. Browser output is shown in Figure 5-20.
    <style>
      body {background-image:url(Stonehenge.jpg); background-repeat:no-repeat;
            background-position:320px 150px}
    </style>
Heading
Figure 5-20. Page with single background image positioned at exact pixel location.
The two pixel measurements--320px 150px--give the distance from the left and top of the page to the left and top of the image. In other words, the left edge of the picture is 320 pixels from the left edge of the page, and the top edge of the picture is 150 pixels from the top edge of the page. You may have to try several measurements before you get an image positioned to your satisfaction.
In addition to specifying exact pixel locations for a background image, you can specify certain percentages of page width and page height for placement of the image. Also, various keywords or pairs of keywords can be used to position the image. The keyword top, right, bottom, left, or center positions the image, respectively, at the top-center, right-center, bottom-center, and center of the page. The keyword pairs top left, top center, top right, center left, center center, center right, bottom left, bottom center, or bottom right position the image at these named locations on the page.
It is important to remember that these positions are relative to the full size of the Web page, not to the size of the browser window. Thus, an image positioned at the center or at the bottom of a page may not be visible until the page is scrolled to bring the image into view.
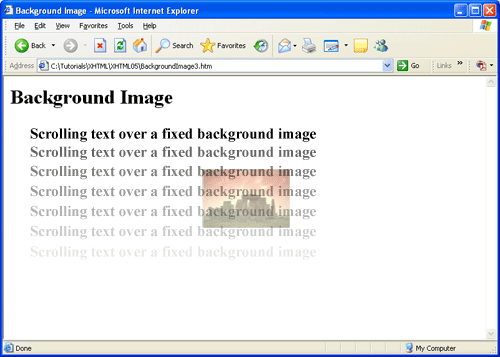
In the above examples, the background image is scrolled when the text on the page is scrolled. For certain types of backgrounds, you may want the image to remain "fixed" so that text scrolls over the fixed background. This effect is accomplished with the background-attachment property. Its default value is scroll. Changing it to fixed keeps the background image in the same position while the text foreground scrolls over the top. This effect is shown in Figure 5-24.
    <style>
      body {background-image:url(Stonehenge.jpg); background-repeat:no-repeat;
            background-position:320px 150px; background-attachment:fixed}
    </style>
Heading
Figure 5-21. Page with fixed background image over which page content scrolls.
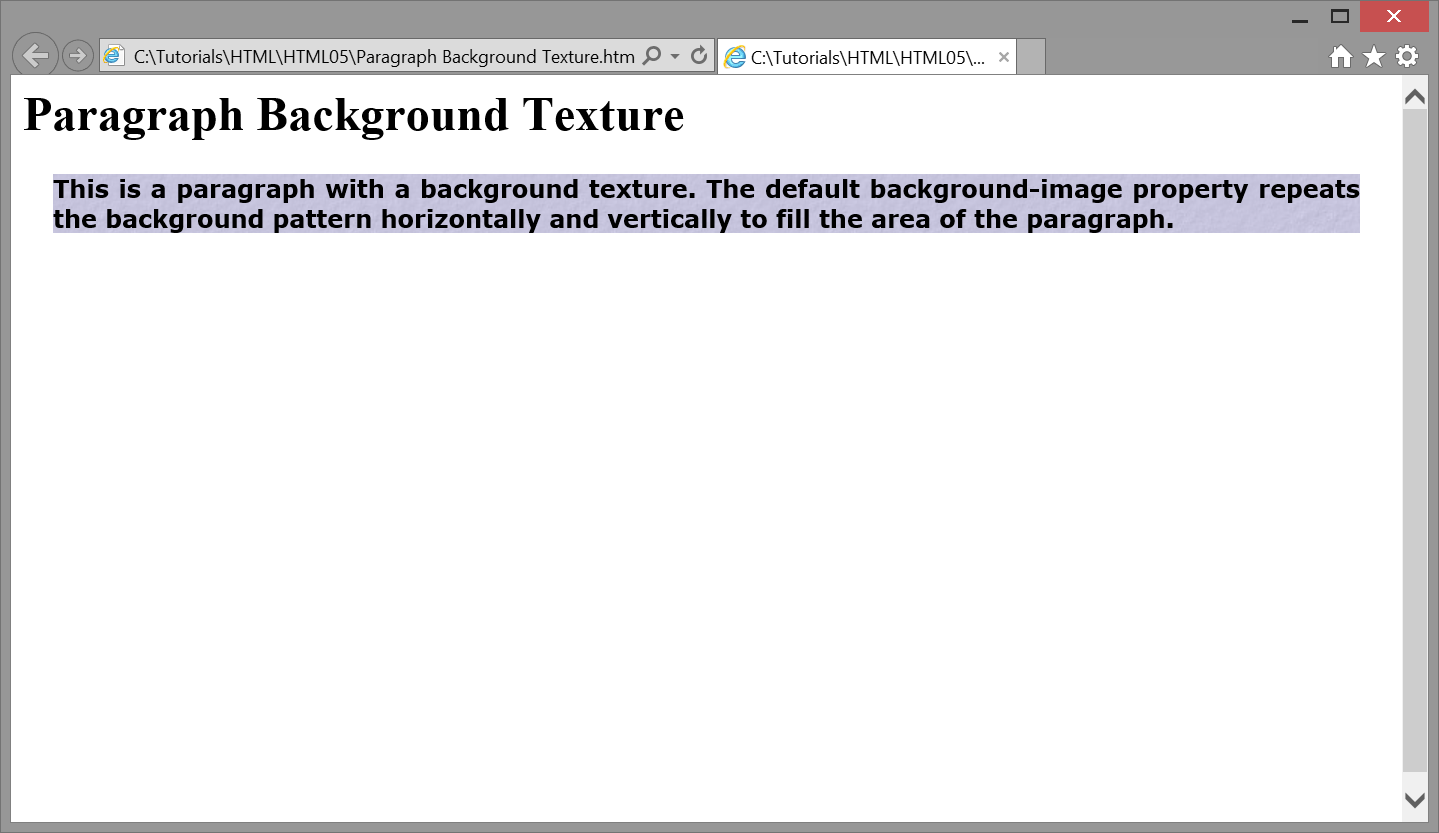
The previous examples show background images for an entire Web page; however, any container tag can have a background image. Figure 5-22 shows a paragraph with a background texture.
<style>
p#BKGND {background-image:url(Background.jpg); margin:20px; font-family:
verdana; font-size:12pt; font-weight:bold; text-align:justify}
</style><h1>Paragraph Background Texture</h1><p id="BKGND">This is a paragraph with a background texture. The default
background-image property repeats the background pattern horizontally
and vertically to fill the area of the paragraph.</p>
Paragraph with background image
Heading
Figure 5-22. Paragraph with background texture.
Background Settings
The following interactive displays show the results of various background settings.
With CSS you can change the transparency/opacity of images to enhance the look of your page. Currently, Internet Explorer 8 and earlier use a different technique for applying image transparency than Firefox, Chrome, and other Internet browsers. Style properties for the browsers are shown in the table below.
Property:
Value
Description
opacity
x x can be a value between 0.0 - 1.0. A lower value makes the element more transparent.
Changes the transparency/opacity of an image. This property is supported by all major browsers including IE9 and later.
filter:alpha(opacity=x))
x x can be a value from 0 - 100. A lower value makes the element more transparent
Changes the transparency/opacity of an image. ** Currently this property is used only by IE8 and earlier versions.
Figure 5-23. Properties and values for image transparency/opacity.
The following example demonstrates how to use the transparency properties in both IE and other browsers
<body style="background-image:url(stonehenge1.jpg);"background-repeat:repeat;font:10pt arial">"<div style="width:400px;height: 180px;margin: auto;"background-color: #ffffff;border: 1px solid black;padding:10px;filter:alpha(opacity=60);opacity:0.6">"<p>
A background image is specified with the background-image:url(url)
property, where the location of the image file is given by its url
address. If the image file is stored in the same location as the page,
only the file name need be coded. If no other style settings are
made pertaining to the background image, it is repeated horizontally
and vertically, across and down the container, to fill the background
with the image.
</p></div></body>
A background image is specified with the background-image:url(url) property, where the location of the image file is given by its url address. If the image file is stored in the same location as the page, only the file name need be coded. If no other style settings are made pertaining to the background image, it is repeated horizontally and vertically, across and down the container, to fill the background with the image.












with text vertically aligned text-top.
 ormally you will create a single letter or word for display in stylish characters. The example letter at the beginning of this paragraph is from the Adobe Rosewood font collection. Most users probably do not have this font installed on their systems. However, it is visible in the browser because it has been converted into a graphic image and placed on the page with an